How to change your RDP port on Windows 10
Changing your RDP port is an important mitigation against brute force attacks. Here's how to do it.

Windows 10's default RDP port is, famously, 3389. This is a fact known to admins, but also to attackers. As a result, brute force attacks will always target this port first. Keeping it the same will result in more bogus login attempts and a higher chance of successful compromize.
It's a good idea, then, to change the RDP port on Windows 10 to one of your choosing. We're going to show you how to do so today using regedit.
Changing the Windows 10 RDP port with regedit
Though the Registry Editor can seem intimidating, changing the RDP port with it in Windows 10 is quick and simple:
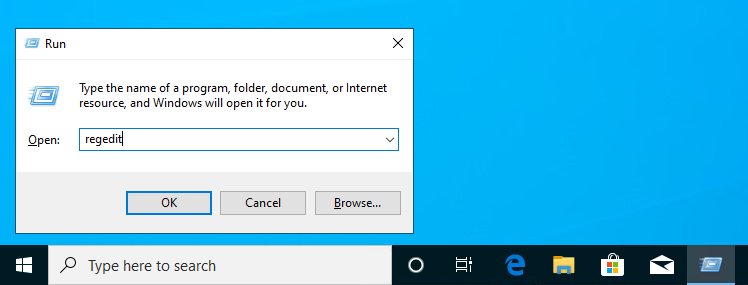
- Open the Registry Editor regedit by pressing 'Windows + R', typing 'regedit', and pressing 'Enter'
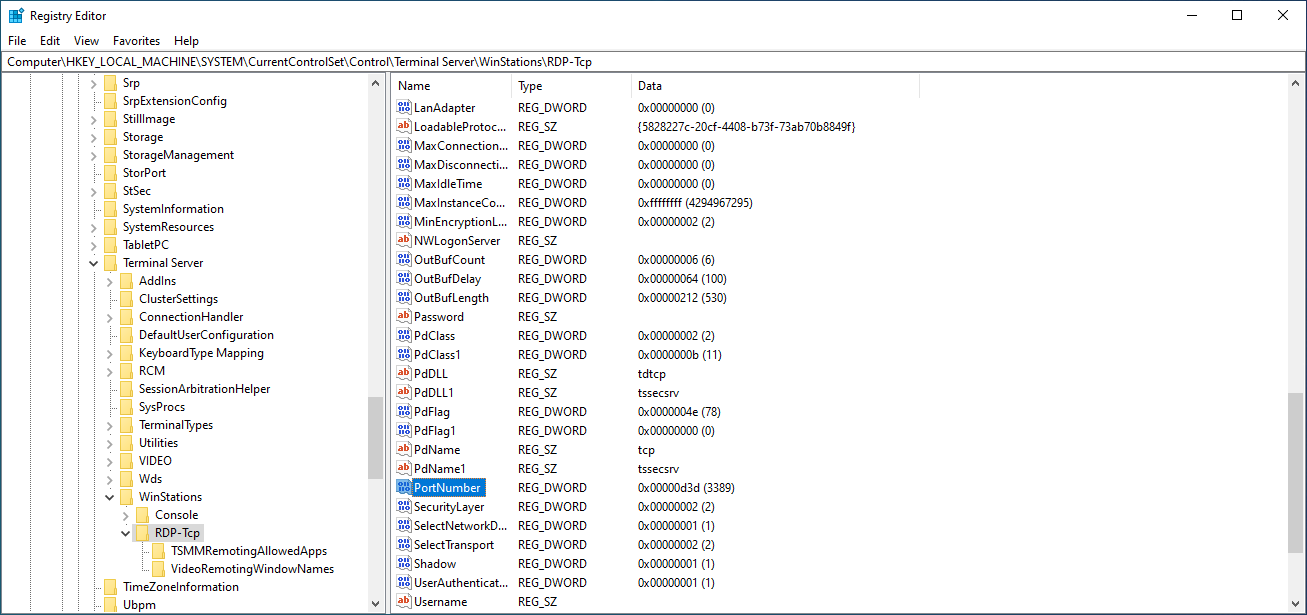
2. Paste `Computer\HKEY_LOCAL_MACHINE\System\CurrentControlSet\Control\Terminal Server\WinStations\RDP-Tcp` into your registry editor search bar and double-click the 'PortNumber' DWORD.
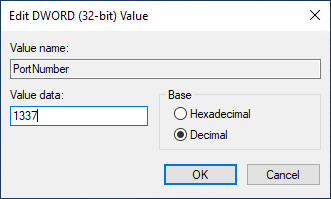
3. Change the 'Value data' to your new port number (between 1025 and 65535). Make sure the 'Base' is set to 'Decimal' and press 'OK'.
Allowing the new port through the Firewall
You've specified your new RDP port, but for it to work traffic must be allowed to pass through it in the Windows Firewall:
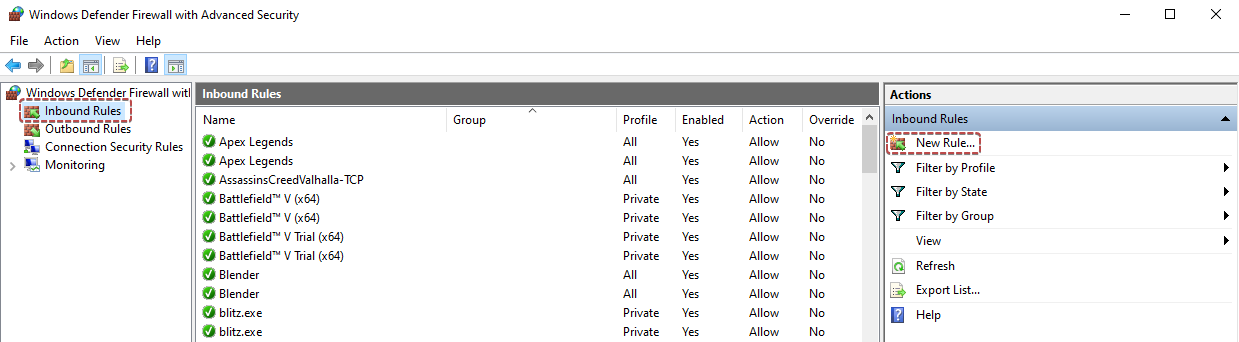
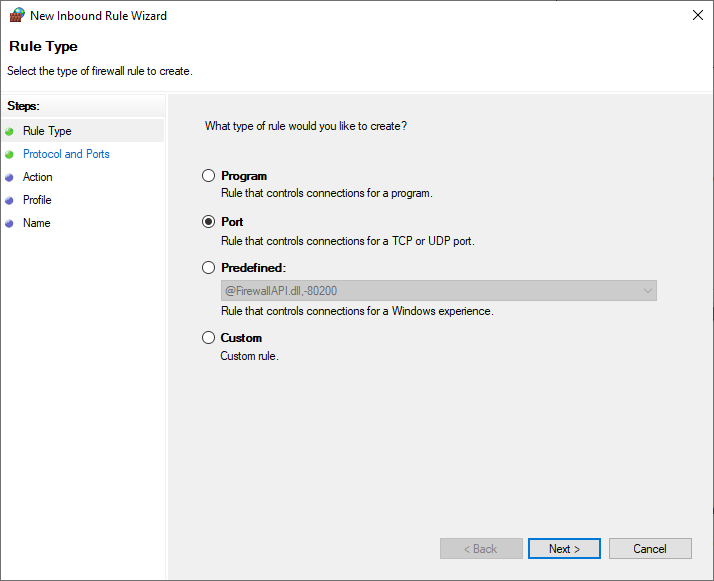
- Open the Windows Defender Firewall App and select 'Inbound Rules > New Rule...'
2. Choose 'Port' on the 'Rule Type' screen and press 'Next'
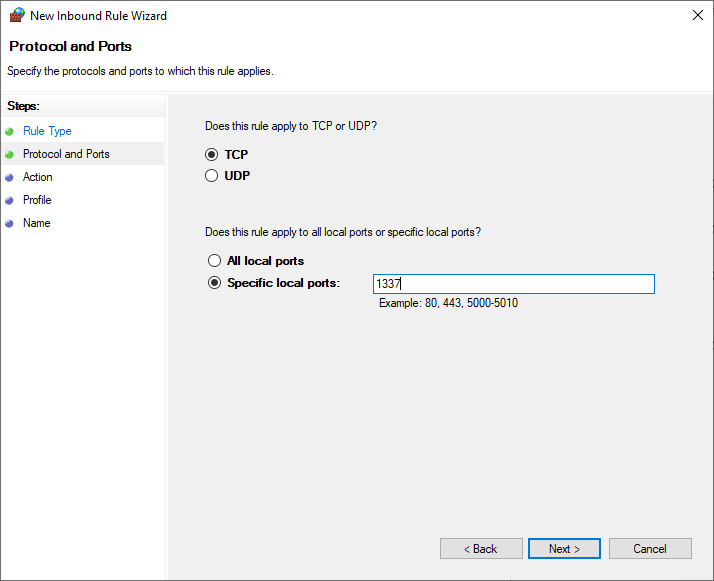
3. Select 'TCP' and type your port in the 'Specific local ports' field
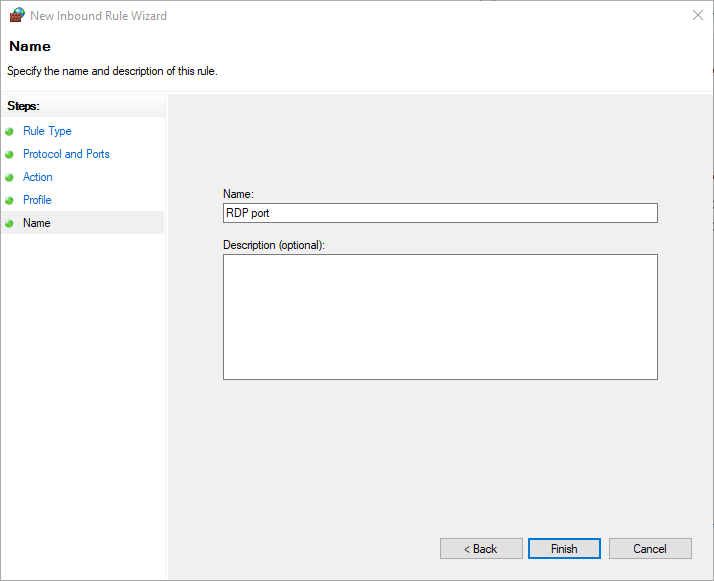
4. Click 'Next' until you see the 'Name' field, and then call it 'RDP port'. Click 'Finish'.
Now your RDP port has been changed and the Firewall adjusted to allow inbound traffic from that port through the Firewall. All that's left is to restart your Windows RDP server and connect via the new port. We recommend restarting via the start menu rather than your VPS control panel to minimize the chance of data loss.